本文以示例的形式详尽介绍如何在Android平台基于Apache MINA框架实现与汉王人脸通设备的通信。
工程下载
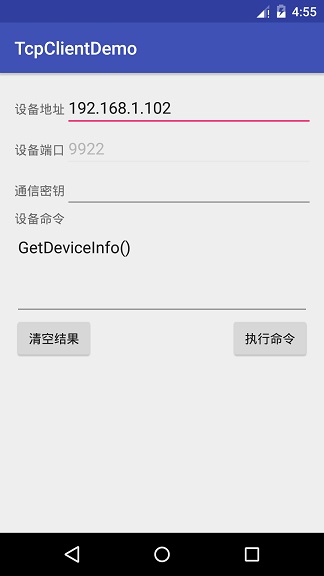
软件界面
前提条件
- Android Studio 2.2.1
- Apache MINA 2.0.15
- SLF4J 1.7.21
- AndroidMinaFaceIdCodec.jar(汉王人脸通SDK)
创建新工程
Application name---TcpClientDemo
Target Android Devices---Phone and Tablet
Minimum SDK---API 21: Android 5.0(Lollipop)
Activity---Empty Activity
Activity Name---TcpClientDemoActivity
更新UI
TcpClientDemo > app > src > main > res > layout > activity_tcp_client_demo.xml
<?xml version="1.0" encoding="utf-8"?>
<LinearLayout xmlns:android="http://schemas.android.com/apk/res/android"
    xmlns:tools="http://schemas.android.com/tools"
    android:id="@+id/activity_tcp_client_demo"
    android:layout_width="match_parent"
    android:layout_height="match_parent"
    android:orientation="vertical"
    android:paddingBottom="@dimen/activity_vertical_margin"
    android:paddingLeft="@dimen/activity_horizontal_margin"
    android:paddingRight="@dimen/activity_horizontal_margin"
    android:paddingTop="@dimen/activity_vertical_margin"
    tools:context="com.firstsolver.tcpclientdemo.TcpClientDemoActivity">

    <GridLayout
        android:layout_width="match_parent"
        android:layout_height="wrap_content"
        android:rowCount="3"
        android:columnCount="2">

        <TextView
            android:text="设备地址"
            android:layout_width="wrap_content"
            android:layout_height="wrap_content"
            android:layout_column="0"
            android:layout_row="0"
            tools:ignore="HardcodedText" />

        <EditText
            android:layout_width="400dp"
            android:layout_height="wrap_content"
            android:inputType="text"
            android:ems="10"
            android:id="@+id/editTextDeviceIP"
            android:text="192.168.1.102"
            android:layout_column="1"
            android:layout_row="0"
            android:labelFor="@id/editTextDeviceIP"
            tools:ignore="HardcodedText" />

        <TextView
            android:text="设备端口"
            android:layout_width="wrap_content"
            android:layout_height="wrap_content"
            android:layout_column="0"
            android:layout_row="1"
            tools:ignore="HardcodedText" />

        <EditText
            android:layout_width="400dp"
            android:layout_height="wrap_content"
            android:inputType="number"
            android:ems="10"
            android:id="@+id/editTextDevicePort"
            android:layout_column="1"
            android:layout_row="1"
            android:text="9922"
            android:enabled="false"
            android:labelFor="@id/editTextDevicePort"
            tools:ignore="HardcodedText" />

        <TextView
            android:text="通信密钥"
            android:layout_width="wrap_content"
            android:layout_height="wrap_content"
            android:layout_column="0"
            android:layout_row="2"
            tools:ignore="HardcodedText" />

        <EditText
            android:layout_width="400dp"
            android:layout_height="wrap_content"
            android:inputType="textPassword"
            android:ems="10"
            android:id="@+id/editTextSecretKey"
            android:layout_column="1"
            android:layout_row="2"
            android:labelFor="@id/editTextSecretKey" />
    </GridLayout>

    <TextView
        android:text="设备命令"
        android:layout_width="match_parent"
        android:layout_height="wrap_content"
        tools:ignore="HardcodedText" />

    <EditText
        android:layout_width="match_parent"
        android:layout_height="100dp"
        android:inputType="textMultiLine"
        android:id="@+id/editTextDeviceCommand"
        android:scrollbars="vertical"
        android:text="GetDeviceInfo()"
        android:labelFor="@id/editTextDeviceCommand"
        android:gravity="top"
        tools:ignore="HardcodedText" />

    <GridLayout
        android:layout_width="match_parent"
        android:layout_height="wrap_content"
        android:columnCount="2">

        <Button
            android:text="清空结果"
            android:layout_height="wrap_content"
            android:layout_row="0"
            android:layout_column="0"
            android:id="@+id/buttonClear"
            android:onClick="handleButtonClearAction"
            tools:ignore="HardcodedText"
            android:layout_columnWeight="1"
            android:layout_gravity="start" />

        <Button
            android:text="执行命令"
            android:layout_height="wrap_content"
            android:layout_row="0"
            android:layout_column="1"
            android:id="@+id/buttonExecute"
            android:onClick="handleButtonExecuteAction"
            tools:ignore="HardcodedText"
            android:layout_columnWeight="1"
            android:layout_gravity="end" />
    </GridLayout>

    <EditText
        android:layout_width="match_parent"
        android:id="@+id/editTextAnswer"
        android:scrollbars="vertical"
        android:layout_height="200dp"
        android:enabled="false"
        android:labelFor="@id/editTextAnswer"
        android:inputType="textMultiLine"
        android:gravity="top"/>
</LinearLayout>
更新依赖关系
把AndroidMinaFaceIdCodec.jar拷贝到TcpClientDemo\app\libs目录下,然后更新build.gradle内容。
TcpClientDemo > app > build.gradle
apply plugin: 'com.android.application'

android {
    compileSdkVersion 24
    buildToolsVersion "24.0.3"
    defaultConfig {
        applicationId "com.firstsolver.tcpclientdemo"
        minSdkVersion 21
        targetSdkVersion 24
        versionCode 1
        versionName "1.0"
        testInstrumentationRunner "android.support.test.runner.AndroidJUnitRunner"
    }
    buildTypes {
        release {
            minifyEnabled false
            proguardFiles getDefaultProguardFile('proguard-android.txt'), 'proguard-rules.pro'
        }
    }
}

dependencies {
    compile fileTree(dir: 'libs', include: ['*.jar'])
    androidTestCompile('com.android.support.test.espresso:espresso-core:2.2.2', {
        exclude group: 'com.android.support', module: 'support-annotations'
    })
    compile 'com.android.support:appcompat-v7:24.2.1'
    testCompile 'junit:junit:4.12'
    compile('org.apache.mina:mina-core:2.0.15') {
        exclude module: 'slf4j-api'
    }
    compile 'org.slf4j:slf4j-android:1.7.21'
    compile files('libs/AndroidMinaFaceIdCodec.jar')
}
开启网络权限
TcpClientDemo > app > src > main > AndroidManifest.xml
<?xml version="1.0" encoding="utf-8"?>
<manifest xmlns:android="http://schemas.android.com/apk/res/android"
    package="com.firstsolver.tcpclientdemo">

    <application
        android:allowBackup="true"
        android:icon="@mipmap/ic_launcher"
        android:label="@string/app_name"
        android:supportsRtl="true"
        android:theme="@style/AppTheme">
        <activity android:name=".TcpClientDemoActivity"
            android:windowSoftInputMode="adjustUnspecified|stateHidden"
            android:configChanges="orientation|keyboardHidden">
            <intent-filter>
                <action android:name="android.intent.action.MAIN" />

                <category android:name="android.intent.category.LAUNCHER" />
            </intent-filter>
        </activity>
    </application>

    <uses-permission android:name="android.permission.INTERNET"/>

</manifest>
编写代码实现与设备通信
TcpClientDemo > app > src > main > java > com.firstsolver.tcpclientdemo > TcpClientDemoActivity
package com.firstsolver.tcpclientdemo;

import android.support.v7.app.AppCompatActivity;
import android.os.Bundle;
import android.view.View;
import android.widget.EditText;
import org.apache.mina.core.future.ConnectFuture;
import org.apache.mina.core.service.IoConnector;
import org.apache.mina.core.service.IoHandler;
import org.apache.mina.core.session.IdleStatus;
import org.apache.mina.core.session.IoSession;
import org.apache.mina.filter.codec.ProtocolCodecFilter;
import org.apache.mina.transport.socket.nio.NioSocketConnector;
import org.slf4j.Logger;
import org.slf4j.LoggerFactory;
import java.net.InetSocketAddress;
import Com.FirstSolver.Security.Utils;
import Com.FirstSolver.Splash.FaceIdProtocolCodecFactory;

public class TcpClientDemoActivity extends AppCompatActivity implements IoHandler {
    private static final Logger LOGGER = LoggerFactory.getLogger(TcpClientDemoActivity.class);

    private final String DeviceCharset = "GBK"; // 设备通信字符集

    private EditText mEditTextAnswer;   // 显示查询结果文本框
    private String mSecretKey;          // 通信密钥

    private IoHandler mIoHandler;

    @Override
    protected void onCreate(Bundle savedInstanceState) {
        super.onCreate(savedInstanceState);
        setContentView(R.layout.activity_tcp_client_demo);

        mIoHandler = this;
        mEditTextAnswer = (EditText)findViewById(R.id.editTextAnswer);
    }

    public void handleButtonClearAction(View view) {
        mEditTextAnswer.getText().clear();
    }

    public void handleButtonExecuteAction(View view) {
        mSecretKey = ((EditText)findViewById(R.id.editTextSecretKey)).getText().toString();

        // 新线程中处理设备通信
        new Thread(new Runnable(){
            @Override
            public void run() {
                IoConnector TcpClient = new NioSocketConnector();
                TcpClient.getFilterChain().addLast("codec", new ProtocolCodecFilter(new FaceIdProtocolCodecFactory(DeviceCharset, false, false)));
                TcpClient.setHandler(mIoHandler);

                // 设置读超时等待时间为60秒
                TcpClient.getSessionConfig().setReaderIdleTime(60);

                // 建立连接
                String DeviceIP = ((EditText)findViewById(R.id.editTextDeviceIP)).getText().toString();
                String DevicePort = ((EditText)findViewById(R.id.editTextDevicePort)).getText().toString();
                ConnectFuture ConnFuture = TcpClient.connect(new InetSocketAddress(DeviceIP, Integer.parseInt(DevicePort)));
                ConnFuture.awaitUninterruptibly();

                // 发送查询命令
                if (ConnFuture.isConnected())
                {   // 连接设备成功
                    String DeviceCommand = ((EditText)findViewById(R.id.editTextDeviceCommand)).getText().toString();

                    IoSession Session = ConnFuture.getSession();
                    Session.write(DeviceCommand);
                    Session.getCloseFuture().awaitUninterruptibly();
                }
                else
                {   // 连接设备失败
                    if (LOGGER.isWarnEnabled()) {
                        LOGGER.warn("连接设备" + DeviceIP + ":" + DevicePort + "失败!");
                    }
                }

                TcpClient.dispose();
            }
        }).start();
    }

    @Override
    public void sessionCreated(IoSession session) throws Exception { }

    @Override
    public void sessionOpened(final IoSession session) throws Exception {
        if (!Utils.IsNullOrEmpty(mSecretKey)) {
            FaceIdProtocolCodecFactory.setEncoderKey(session, mSecretKey);   // 设置加密密钥
            FaceIdProtocolCodecFactory.setDecoderKey(session, mSecretKey);   // 设置解密密钥
        }
    }

    @Override
    public void sessionClosed(IoSession session) throws Exception { }

    @Override
    public void sessionIdle(IoSession session, IdleStatus status) throws Exception { }

    @Override
    public void exceptionCaught(IoSession session, Throwable cause) throws Exception {
        if (LOGGER.isWarnEnabled()) {
            LOGGER.warn("EXCEPTION, please implement " + getClass().getName()
                    + ".exceptionCaught() for proper handling:", cause);
        }
    }

    @Override
    public void messageReceived(final IoSession session, final Object message) throws Exception {
        this.runOnUiThread(new Runnable() {
            @Override
            public void run() {
                mEditTextAnswer.setText(message.toString()); // 显示消息内容
                session.closeNow(); // 断开连接
            }
        });
    }

    @Override
    public void messageSent(IoSession session, Object message) throws Exception { }

    @Override
    public void inputClosed(IoSession session) throws Exception {
        session.closeNow(); // 断开连接
    }
}
启动虚拟设备并更改IP
虚拟设备选择 Nexus 5 API 22
更改虚拟设备IP
进入adb shell
输入setprop net.dns1 192.168.1.1 即可把DNS修改成电脑DNS
输入setprop net.gprs.local-ip 192.168.1.248 即可把IP地址修改到和电脑一个网段
在虚拟设备上运行程序